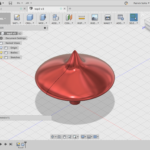
I designed a top using Autodesk Fusion 360, a cloud-based software package from Autodesk, and printed on a Makerbot Replicator in the Georgetown University Maker Hub. Originally, I started this project to submit to a multimedia competition hosted by the library. Even though the project was not accepted as an entry (due to limited number of entries allowed and probably also because other people were making genuine works of art rather than cheap toys), I learned a lot from this project. With the ability to rapidly print and test prototypes, I was able to improve the design based off observation of the top’s function in the real world. Additionally, I learned CAD design methods and software tricks in the process of bringing the design to a level of quality that could be printed.

I made three major changes between the initial version and final version, based how well the initial and intermediate versions performed:
Density
I started with a fill density of >50%, which means that over half the space in the red top is filled with plastic. 3D prints rarely need to be entirely plastic: most often, the printer can create a stable solid by printing a waffle or beehive mesh beneath the surface. The outside of the print looks solid because the printer adds a completely solid “skin” around the exterior.
The final version had a fill density <40%. The main benefit was that this allowed me to prototype faster: the denser the print, the longer it takes to print. (Also, being conservation minded, it’s always good to use less material when you can.) As long as the weight is evenly distributed around the center, a top still spins! Plus, I suspect that the lessened weight puts less pressure on the spin point, causing less wear from both friction and collision with the spin surface, allowing the top to last longer.
Shape
The original design had the top as a perfect cone, tapering into a single point at the bottom where it was to spin. Since a 3D printer cannot print an infinitely fine point (it is limited to the width of the print filament), the actual physical version spun on a small but flat dot. After a few spins, the point at the bottom was crushed, giving way to the airy mesh below. This new spin point was uneven and dull, causing the top to quickly wobble and also slowing the spin with excessive friction.
The final design (shown in the picture above) ends in a narrow parabola – very close to a point, but ultimately still round. The 3D printer is able to replicate this spin point a little more accurately. The curve at the bottom tolerates more more stress than a single point, preventing the spin point from collapsing as with the original version.
You’ll also notice that, after an narrow curve at the spin point, the top widens out drastically at the top. This lowers the top’s center of gravity. A lower center of gravity makes it less likely that wobbles will cause the top to spin out of control.

Number of Pieces
The original version was made of 2 pieces – one for the spinning cone, and one for the handle that you grabbed with your fingers to twist. I made it like this because I believed it would be easier to 3D print, since printing as one piece would require part of the top to dangle over open air during the print. 3D printers create objects by creating a stack of several 2D layers, one by one. The printing software adds supports beneath any sections of the object that dangle over open air, so that the dangling layers can rest on something as they’re being created instead of falling to the floor of the printing plate. I thought that removing supports would be too difficult and could compromise the spinnability. However, attaching the two pieces was extremely difficult. I tried again with one piece, and removing the supports was much easier.
